Amenti 6

The last week prior GGC. I spent most of my time on different menus of sorts and also did some bugfixes. At this point the mechanics in the game felt great so we pretty much just had to playtest a lot and fix minor bugs in the game. We also needed to add some more feedback, you can almost always add more feedback it feels like.


Mainmenu:

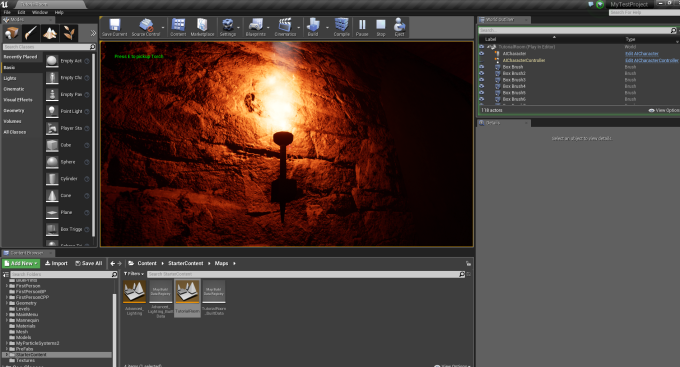
I made a mainmenu in a quite early stage of the development which we had as a placeholder until now. But it contained programming art and was a pretty ordinary/boring menu so I knew that I had to redo it at some point. It was not on the top priority list of tasks so that is why we waited this long before doing a better one. I chose to create the menu background of a in-game camera, since it would save time from the graphical artists which had a lot of other things to do themselves. Also because we wanted to make the menu feel more “alive” rather then a static image. To make the menu feel more “alive” I added two additional cameras to the menu, one for the controls alternative and one for the options alternative. The three different cameras blend between eachother whenever one of the three options are clicked on.

It thought it be really boring creating a menu because it usually is but this time it was actually fun. Creating menus in Unreal made it possible to get a great looking menu aswell as a camera blend and transition that feels quite natural.

Mainmenu

Loadingscreen:

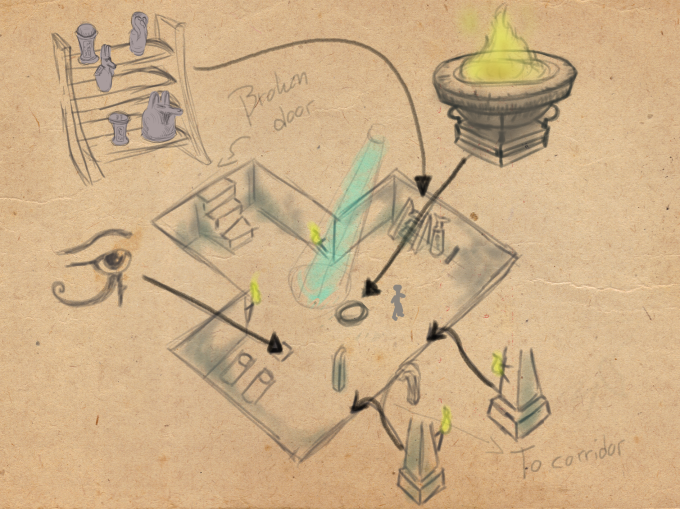
In addition to the main menu I created a loading screen that pops up once the player clicks Start Game. This makes the transition between loading the main level feel better. Otherwise the screen would just freeze and it felt cheap. We also wanted a audio cue to play when the player clicked start which was about 6 seconds long. This meant that I had to delay the loading of the main level with about 6 seconds to allow the audio cue to finish. Otherwise the sound would just been cut off and which would sound very laggy and weird. Opening the main level would otherwise take two seconds but since we wanted this audio cue it went up to 8-10 seconds. I also added three concept art pictures to the loading screen which is switched between during this time.
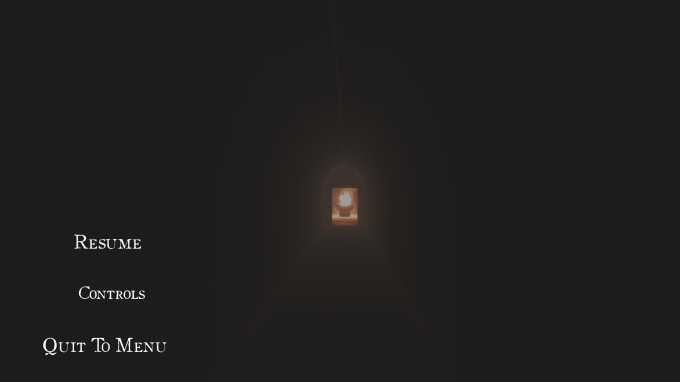
Pausmenu:

The pausmenu is quite simple, it pauses the game and allows the player to take a break or simply return to menu and shutdown the game. I also added the controls in this menu in case people would have missed them in the main menu, and can be nice to be reminded. When the player is in-game and press Escape this menu pops up and pauses the game.

PausMenu.png

Endscreen:

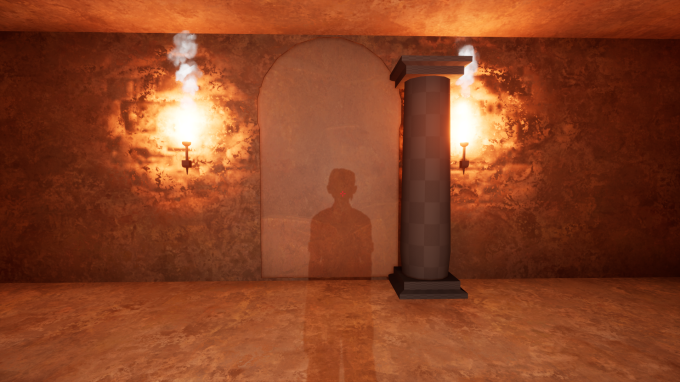
When the player has finished all the puzzles and is finished with the game we wanted a endscreen that shows our game logo, team logo and our roles and names in the team. So I created this simple endscreen that fades to black upon walking on a trigger box. And thereafter fade in and out the different logos and credits. This took longer time to create than I anticipated. The reason why it took longer was because functions that usually exist in a ordinary blueprint script did not exist in a widget blueprint which I had to use in order to create the menus and this endscreen. Apparently they are different and therefore they do not have the same functions. I wanted to use a function called Timeline, which basically does what it is called. You create a timeline between lets say 0-3 seconds and during this time you can alter variables. I wanted to use this to fade in and out the images. But I could not so I had to rethink and solve it in some other way so I ended up using a lot of lerp functions instead. In the end the code functionality and structure for this endscreen just felt stupid and wrong, but I didnt care since it was the I had already worked for 10 horus and was really tired. But atlest it works!

Endscreen

So I did a lot this last week, we pushed ourselves a bit more since it is the final week before the conference and the last week we work on this project. It has been amazing working on this project for the past 8 weeks!

Amenti – 5

This week I’ve mostly been working on feedback and also a lot on making our mechanics work in the Main Level. The Main Level is the scene where all final things are implemented. When working on new things that will be implemented we work in our own levels that are just copies of the orginal one since new mechanics/assets often needs iteration and when that is done we’re allowed to implement those in the main level.

So what happened this week and the week before is that the graphical artists have implemented a whole bunch of new assets into the main level which has messed up some of the mechanics causing them to not function as usual. Since we had our Beta-playtesting this week it was one of the top priorities to get main level to work properly, and that’s what I did.

So as I said I’ve been working on some feedback and it has been much fun working on this. I have taken help from Kevin this time to create some glowing materials which I have implemented with some blueprints on objects of interest that we want the player to notice. Amongst these are the HorusEyes, AnubisStatues and the left hand.

Both the anubisstatue and the hand got a green emissive material that represents the player picking up life and once given to the statue it starts glowing. The horuseye on the bottom image got a red/orange emissive material that starts glowing once the player stands on a horuseye platform to attract the players eye. It’s been a lot of fun working on these feedback effetcs and gives the player a better clue what to do in these situations.

Later the same week on friday we had a playtest which went reallt well. Many people played our game and actually made it through the whole game without much help from our side, which feels great. They also gave good feedback and found some interesting bugs which was pretty minor and easily fixed. Lightning in the horusroom was the biggest problem since people couldn’t see a lever which is placed in a quite unfortunate spot where there is little light. But we’re very happy with how it went!

Thats it for this time!

Amenti – 4

I have done a lot of design work on the Horusroom and at this point I am pretty satisfied with how it is.  I also worked some on feedback to make the player understand that he/she is doing something right and is on the right track.

HorusEnter.png

Here is an image when the player first enters the Horus room. The first thing the player sees is a round kinda wierd looking thing on the wall with arms sticking out of it, and two levers. This round thing is supposed to symoblize the sun. After all it is the room of the god Horus who actually is the sun god amonst other things, so it only seemed fitting.  Besides from being symbolic this sun has another purpose in this room and that purpose is to give feedback to the player when he has lit a torch in the room. And this is one of those feedback things I have been working on. Once the player lights a torch one of the arms will start to glow like the image below shows. Each arm is also connected to a specific torch so that the player can keep track on which torches are lit. Which I think is pretty cool and works as good feedback to the player.

As you might have noticed there are only five arms which also means that there are only five torches in this room. This is one of the improvements I have done in this room. By making the torch amount smaller we could make the room smaller which makes it easier for the graphic artists to make this room feel more alive, and enjoyable. Since it can be difficult with large rooms since there will be a lot of empty spaces that needs to be filled out. Horusperspective

There is also a perspective puzzle in this room now that I put some hours on. There is a bunch of chains hanging from the ceiling that holds jewlery which resembles door arches, and I made it so that one of these match perfectly in a certain angle to the other door arch standing on the first floor in the room. This puzzle was actually pretty cool and fun to work on and looks pretty neat.  Once the arches are lined up, the arch from the jewlery will teleport next to the other arch creating a door that opens and leads the player into a small room with a torch in it.

Once all torches are lit, all the arms on the sun will be lit aswell and besides that I made it so that the players screen lights up and a melody will play along with that. This happens after all puzzles and is meant to be an indicator that the player is done with this room and puzzle. Unfortunatley I have not got any images of it at this moment.

So that is what I have been up to since last time.

Amenti – 3

Lately I have been working a lot on the Horus puzzle. I have playtested and tweeked the room and placement of the torches to make the puzzle a bit more interesting. And I also came up with an additional perspective puzzle which we will add to this room during the next week.

The first concept and version of this puzzle lacked interesting choices the player had to make in order to light the torches in the room. The former version was basically just running around in a circle and light torches without any problem at all, the player did not have to stop and think about the next move or in which order to light them. Which is just a really boring puzzle room, or not even a puzzle in that case. Therefore this week I had to spend most hours playtesting and repositioning the torches to make it more challenging. So me and Gustav the lead designer sat down and  discussed new ways to make it a bit more interesting. I came up with the idea that we should have some walls that follows along with the floor when elevated or lowered, and also put torches on these walls.  In that way we could we could create situations where the player had to elevate the floor to the third level and light a torch/firepit which could not be lit at first or second level and then lower it down again to light other torches on other levels. We could also choose which walls that should follow along to make it so that certain torches can only be accessed on certain levels. In this way we force the player to visit all three levels in the room in order to complete the puzzle. With this small tweek of walls following along we could make the puzzle a lot more interesting.


In the former version of this room the player entered the room on the first level but I decided to redesign it so that the player enters the room on the third level while the floor is still on the first level. I made this choice since I want the player to get a good overview of the room right before starting the puzzle. The player can see where torches are placed and think of a way to figure out the puzzle and plan out the best way of solving it.

In the image on the top left you can see that there is a platform on the third level of the room. This one is added for the perspetive puzzle that we will create next week. The idea is that the player need to stand on the platform and lower down the floor to the first level, so we put to levers on this platform aswell. And there is a chain hanging down from the ceiling with a very small doorarch hanging from the end of the chain looking like a piece of jewelry. But when positioned right on the platform and looking down towards the other door arch on the first level (you can see it on the image at the bottom), together they will form a door and the player will be able to access a torch in the first level that otherwise cant be accessed. It may sound a bit difficult but is actually quite easy! The more difficult part is to get the player to understand that they need to stand on a specific position in order to trigger this event. But we leave that to next week!

Thursday this week we had playtest with the rest of our class and all the first year students. People who playtested actually enjoyed the game, more then I though they would. Since there is still a lot of feedback missing to tell the player what is going on. And feedback for our puzzles is a essential part in order to complete them, especially the perspective puzzles. But they liked the graphics even though 80% is just placeholders, which was a bit funny. Otherwise the playtest went as we axpected it to, there were a lot of confusion on the tutorial perspective puzzle and by lacking a animation when the player has fire makes it difficult to know when you actually have fire to light torches. So thats what we will do next week.

That’s it for this time!


Amenti – 2

Second week of the project is now done! This week I have done plenty of stuff. All mechanics for the tutorial room is finished and almost all mechanics in the Horus room which is the next puzzle the player encounters, the fire/sun god puzzle.

I started off by working on the last mechanic in the tutorial room which was the perspective mechanic. We wanted that when the player is standing on a certain location and is looking at a certain point/object an event is triggered. In this case we wanted two door arches to come together as a door when the player was standing at a point looking between the two torches in the tutorial room. RaycastTutRaycast2Tut.png

At the moment the door arches are placeholder pillars and as you can see in the image there is a red line/beam being drawn out from the players location towards where the player is looking. We are using a function called raycasting which creates a vector from a start location (the player location) to a end location which is whatever we decide it to be, you can call it the raycast range. Between these point we have drawn out a red line for debug purposes which makes it easier to explain and show for others, but will not be drawn out in the finished game! Anyway, there are two components that is required for this to work, a triggerbox which checks if the player is standing in the right location which triggers the raycasting and the other component is the pillar that checks if the raycast is colliding with the door object. While the player is looking at the door one of the pillars will start moving towards it’s end location which is next to the other pillar that is already in place. When the pillar is at the endlocation one of two conditions to open the door is complete. The other condition is that the torches has to be lit next to the pillars. If both conditions are met the door will open. And that is the puzzle of the tutorial room done! We were two working on this solution of the perspective puzzle. I made the raycasting function along with the triggerbox and a door object that checks if conditions are met. While Erik the other programmer in our group worked on getting the pillars to start moving when raycasting on the door. Which might seem like a simple task, but it was more difficult than we anticipated. But now all mechanics are done and working as we want!

Besides that I worked a lot on the Horus room which uses the mechanics the player recently learned in the tutorial room but with a little higher difficulty. The only mechanic I had to add in this room was an elevator that the player can use to reach three different floors. Which I made without any major difficulties. I created a floor object on which I placed two lever objects. When the player approach one of the levers and press E it will either go up or down a constant x value in z-axis. While the floor is on the first floor the lever to go down cant be used and while on the third floor the lever to go up can not be used. With that done I could start prototype designing the Horus room. At the end of the week it looked like this:

First Floor:HorusRoom

Second Floor:secondfloorHorus.png

As you can see in these images there are torches on different heights in the room which requires that the player go to each floor to light them. The puzzle is done when the player has lit all the torches.

Here is the design concept I followed while creating this room:Horus Room.png

Besides this I worked on a AI for the small rats we will have later on in the next room, the Anubis puzzle which is all about taking life and giving life. The AI is really simple it is just wandering around to random location  within a certain radius. I also added a short delay after each random location is reached until it starts wander to the next random location, to give it a more likely rat behaviour. I added these since the player will be able to take life from the rats in order to give it to something else. At the moment they are tiny humans running around which looks hilarious. HorusRoom2 That is all I have achievied this week and I am pretty satisfied with what we have accomplished!

Amenti – 1

The first week of the project mostly contained a lot of planning and documentation which can be tedious but deep down we know that it is a essential part to make the project go much smoother.

Besides planning and documentation I have worked on the prototype of the tutorial room where the player is introduced to the core mechanics of the game. The majority of the mechanics are based on interacting with objects and picking up stuff, like fire, life or water. And it is my job as the lead programmer of the group to come up with a solution to make these mechanics work.

What I came up with was a  simple inventory system that stores items when the player press E on certain objects. The inventory it self is very simple since it is only a String Array which we add to when the player picks something up. A String Array is a list which only takes data as texts, so when the player picks up fire for example we add “Fire” to the list. This makes it very easy to add new items to the inventory. This was not very difficult to implement. After that I had to create a script for items which allows the player to pick them up and add them to the inventory. I gave the items a triggerbox property which sets a boolean variable to true when entered and sets it to false when the player exits it. This makes it so that the player has to be within a certain reach to pick the item up. I also created a String variable where you can set the Item name which gets added to the inventory when picked up. InteractionAmenti

When the player is within reach the green text appears in the upper left corner which you can see in the image above. Which tells you what button to press and the item name. This particular item is a torch and when picked up the fire particlesystem on the torch is turned off. I also added functionality so that the player can press F to light the torches while having fire in the inventory, which can be picked up from firepits or other torches.

TutorialTorches.png

The last thing I added this week was the functionality of the door. When both torches are lit the door is raised upwards. The door is a object itself and adds the torches in the tutorial room to a list. Thereafter it checks if both torches are lit and if so it starts opening, and that is about it!

This is everything I have accomplished during the first week which I am very satisfied with. It feels great to have the inventory and item system done since it will be very useful later on for our other rooms and puzzles. Besides this programming focused work I have also been prototyping the tutorial room “design wise” where I followed a drawn concept of the room that our Lead Designer Gustav made. Here is the design concept!tutorial room

Trowl – EndState

This week we have had a lot of things to do since final is closing in. Most of the tasks this week has been buggfixes and implementing all animations to make the game more smooth and fun to play. But one thing that I have worked a lot with besides these tasks is the Endstate of our game.

The Endstate is the state when the player either loses or wins the game. The easiest one of these two were the lose critera. When the players stress has reached its maximum amount the player dies and the game is over. Stress represents the players health. So this part was actually quite simple. The win critera however, was anything but simple. I had this vision in my head where the player wins and the locomotive appears and when the player passes the locomotive the player has won. It might sound simple when put like this, but it really was not.

There are some thing that I need to clarify before I can explain further. We have two trains which we loop since our game is a sidescroller. Basically we draw two trains after eachother and loop them when they go out of screenbounds to create the illusion of a long running train. These are constantly drawn out and looped as the game is running.  So, what I wanted to do was to draw the locomotive as soon as the player picks upp the last owlet from the train (owlets needs to be picked up to win the game). And when this occured I also wanted to replace one of the trains with the locomotive and stop drawing that train. And this should only happen if the last owlet was picked up aswell as the second train was fully visible on the screen. I chose this solution beacuse I wanted to create a smooth transition.

To do this I made a boolean variable that checked if the last owlet was picked up and change it to true. And if this boolean variable was true aswell as the position of the second train was equal or less to zero in the x-axis the locomotive was to be drawn out and the other train stopped being drawn. And when the second train was out of screenbounds it also stopped being looped and drawn out. And finally when the locomotive was out of screenbounds the player has won! I worked many hours trying to accomplish this and now it works as I wanted it to. I am very pleased with the outcome!Blogg6

Trowl – Enemy Waves

This week  I have been working on something we call Enemy Waves.

In a lot of games you have different waves of enemies. The purpose of these waves is to present a new enemy type or challenge the player in some way. Sometimes a combination of both. Our game has a total of ten waves at the moment. We thought that presenting each enemy type would be a good start of our wave system. We got three different enemy types and wanted to present these in the first three waves. First we start of by sending in the easiest enemy, the Falcon. This enemy only has one health. Next wave the player would encounter our second enemy type, the Hawk. Which has two health. And on the third wave our third and most difficult enemy type is sent in, the Eagle. This enemy has three health and therefore the most difficult one to kill. The first five waves looks like this: EnemyWaves

So, after presenting each enemy type we start to combine them in order to test and challenge the player. These first five waves works fine and is not to difficult to complete, but the rest of the waves still need reworking since some of them are way too difficult. You could say that we have a lot of play-testing ahead of us.

Enemy Waves is a class that I created which primary function is to draw out the enemies when want and to update them. This class stores references from each enemy type and power-up so I can easily access them in the Enemy Wave class. In each wave I call for a function that draws the chosen enemies and power-ups that I want the wave to contain. For each wave I have created a boolean variable which can be either false or true. When the boolean value is true, the wave is initialized. When the boolean value is false the Wave is finished and sets the next waves boolean value to true. A wave is finished when all enemies in that wave is either dead or out of screen bounds. After each wave I also have to reset the enemies position to their original one. To do this I call on a respawn function that resets their position, health and sets another boolean value to true which allows me to draw them once again.

Creating this Enemy Wave class was difficult. I had never done something like this before and therefore it took quite some time to come up with a solution that worked. At first I had a lot of issues with it causing the enemies not to respawn correctly and many other problems. But now it kinda works like a charm!

That is all for this week!


Code Review – Group 15

This is a code review of Group 15’s player class. I will look into how did they implement their player class in their game, what kind of bond to other classes it has and what functions it holds.

To make their player class work they have four keystones:

  • The player class inherits from an Entity class which inherits properties and functions from another class called GameObject. The GameObject class handels most of the games different objects movement, position and when to draw objects in the game.
  • A DrawManager is included which handels the rendering and drawing of the sprites.
  • A SpriteManager is included which handels the different sprite textures.
  • A CollisionManager which handels the player’s collision with other textures.

The functions of the class do not really do much at the moment besides the Update function which handles the player’s movement. The player controls the avatar with WASD and the mouse points out the direction the player is facing and where the player would like to shoot for example.

In GameState the player class position is called upon in order to set the enemies movement towards the player if engaged and if their health is above 0.

Something I do not understand is why the player’s movement controls are created in GameState as well, when they already have one in their Player class. The best solution to this would be to call upon the update function from the player class instead of have multiple functions for player movement. In my opinion it also is more neat to have less code I GameState and much easier to find and modify if needed, if it is placed in the player class.

In the GameState draw function the player calls upon a draw function from the DrawManager to render and draw the player sprites. This is good since it is just one short line of code and does not require anything else. This is how they should have called upon the Update function from the player class in the GameState update function to decrease the amount of code.

The player is also connected with a camera that checks the player’s X and Y position and therefore always focused on the player.

Besides from that one slight flaw with player controls being created twice there is not much that I would like to change. I would like to see them use the player class a bit more though. Maybe put the collision of the player in there as well, just to have easy access to.

But overall it looks good!

Trowl – Thunder

This week I have been working on one of our obstacles in the game. This obstacle is a thunderstorm that occurs at certain occasions as the game proceed. The thunderstorm event takes place on the top of the screen and covers an area that is 1920 pixels wide and 300 pixels tall. Here is a picture of how it looks like in the game:

Åskablogg

The thunderstorm sprite is just a temporary one which I drew myself! As you probably can see it does not really fit in with the artstyle. It is what it is and works as a temporary sprite to do some testing with the obstacle, and so far it works kind of as we want it to.

To implement this obstacle I created a new class called “Thunder” with different functions. The functions in this class is actually quite similar to the functions in our “HardWinds” class which I talked about in a earlier post. The Thunder class stores the hitbox of the sprite which at the moment is equal to the thunderstorms size, 1920 x 300. When the player collides with the thunderstorm hitbox it increases the players stress. Stress represents the players health. The program checks the collision between the player and the thunderstorm by checking if the two different sprites overlap eachother. And if they do the collision function is initialized and a function from the HUD is called upon which increases the players stress. At this time this obstacle occurs every 20 seconds and has a duration of 10 seconds. This is achieved with a function which the HardWinds class also use. This functions uses three different float variables: one for elapsed time, one for duration and one for frames/second. As the game starts the frames/second starts counting and is equal to the elapsed time variable. And when the elapsed time is equal to the duration variable (which is 20 frames/second) the thunderstorm event is called upon.

Like I said before this obstacle mostly works as we want it to, besides from two flaw. The players stressmeter increases extremly rapid as soon as the player enters the thunderstorm and kills the player within seconds after entering it. This makes the obstacle a bit unbalanced and need to be dealt with. The second flaw is that the thunderstorm just suddenly pops up without any warning and easily kills the player if the player is positioned on the high end of the screen. To fix this we have to implement som sort of thunder sound that alarms the player that this event is about to occur.

So that is all from me this week!